Screenshot on Laptops: Taking a screenshot on your smartphone is a simple process, but it might get confusing trying to do the same on your laptop. Fortunately, there are a bunch of in-built tools in both Windows and MacBook laptops that are super accessible and can take a screenshot in no time. In this article, we bring you the 6 easy ways to take a screenshot on a laptop.
How to take a on a Windows Screenshot on Laptops
There are a bunch of methods to take a Screenshot on a Laptops in Windows . You can use either the ‘print screen’ key or the in-built snipping tool on your Windows laptop. Here are some of the easiest methods you can take a screenshot.
Use the Print Screen key

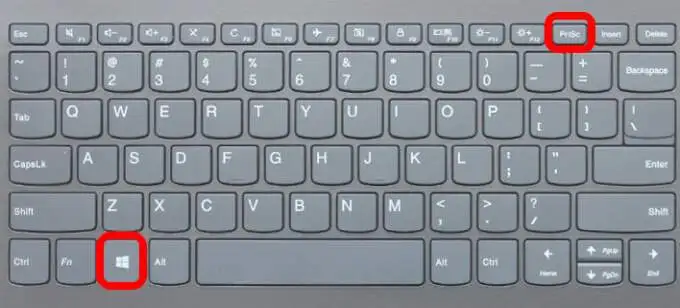
The ‘print screen’ key can be found near the backspace and the delete key on your laptop’s keyboard. It might be named ‘prt sc’ on your keyboard. All you need to do is load the screen you wish to take a screenshot of, and press the print screen key. Windows will take a quick screenshot that can be previewed and saved on Microsoft Paint or any other image editing software. All you need to do is open MS Paint and press ‘Ctrl +V’ or right-click and choose ‘Paste’. You can also carry out the same process on a photo editing tool like Photoshop or Pixlr.
Note: Some laptops might require pressing the Windows key along with the ‘prt sc’ key to take a screenshot on a laptop. On pressing this combination, the screenshot will automatically be saved in the Screenshots folder.
You can access it by going to File Explorer>Pictures>Screenshots.
Use the Snipping Tool

If you’re looking for other ways to take a screenshot, the Snipping Tool can come in fairly handy. Simply search ‘Snipping Tool’ in the Windows search bar and once you’ve opened the app, choose ‘New’. Choose the area on the screen you want to capture. Once you’ve chosen the area, the Snipping Tool will open the screenshot on a preview window where you can further edit it. The screenshot can then be saved in whatever format you want.
Use The Snip and Sketch Tool for Screenshot on Laptops

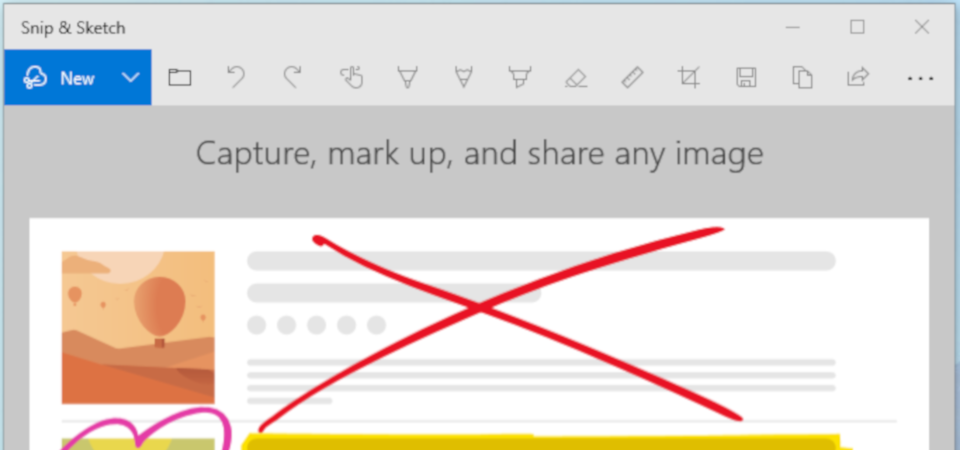
The ‘Snip and Sketch Tool’ is another in-built app on your Windows laptop that allows you to take a screenshot. It works similar to the snipping tool, with added options of choosing from multiple shapes and the availability of different brushes and colors to edit the screenshot. Once you’re done editing the screenshot, press Ctrl + S to save it.
Use the Xbox Game Bar

You can use the Xbox Game bar on your Windows laptop to record the screen or even take a quick screenshot. Just launch the Xbox Game Bar and click the Camera icon at the top left corner of your screen. The Xbox Game Bar would take a screenshot and notify you. Click on the notification to access the screen
how to take a screenshot on your MacBook Screenshot on Laptops

If you’re using a MacBook, there are a couple of easy ways to take a screenshot of your laptop’s screen. We’ve listed two methods that do not require any third-party app or software.
Use the Screenshot Tool

Your MacBook has a built-in tool to take screenshots and even record the laptop’s screen. All you need to do is choose Launchpad>Other>Screenshot or simply press Shift+Command+5. Once the screenshot tool has been launched, all you need to do is choose the screenshot option from the toolbar. You can even choose a portion of the screen to capture or record the screen. Using other options you can also take a Screenshot on a Laptops after a short delay. The screenshot would be saved to your Desktop.
Use Shift + Command combinations
There are a few key combinations that lets you take a screenshot on your MacBook. Here are the most important people.

- Shift+Command+3 captures your entire screen and saves the image on the Desktop.
- Shift+Command+4 captures a portion of the screen. You will need to select the screen area before the screenshot is taken.
- Shift+Command+4+Space will launch a Camera icon. Launch the window you want to take a screenshot of and click on the Camera icon to capture it.
- Shift+Command+Control+4 saves the screenshot to the clipboard, and it can be pasted on any image editing app or software.
These are the 6 easy ways of taking a screenshot on your laptop. Besides from these built-in tools, you can also download software like ShareX and SnagIt to take a screenshot on Windows and MacBook respectively. If you want to record the screen on your Windows laptop, you can read our full guide here.
If you found the information helpful, please follow our Facebook page for more tips and updates. You can find us at MahaNeo.Com on Facebook. Join our community and let’s grow together!


